
How to Butcher and Skin a Chicken Step-by-Step, with pictures!
By The Petite Plantation - September 14, 2020
This post is not for the faint of heart. Today I am sharing how we butcher and skin our chickens to preserve the harvest.
It's always a somber day when it's butcher day but we take comfort in knowing that these chickens that become a nourishing meal for our family, they had a much better life than ANY chicken we have ever bought from the grocery store.
They got to frolic, scratch, eat bugs and weeds and always got the most desirable kitchen scraps.
This is their one bad day.
Why would you want to skin a chicken?
Skinning a chicken is easier than plucking and even though there are machines that do the plucking, this is simpler, cleaner, and doesn't require extra machines.
We're also living off the grid with minimal power and running water!
How do you skin a chicken?
This is your warning! There are pictures of a dead chicken so if you don't want to see a dead chicken, stop scrolling!

I always start with the legs, then the wings. With the chicken breast side up I take the first leg and find the space between the joint above it's foot and make the first cut into the joint.

You can bend the foot up and down to see the joint move to find this space. Once you have sliced into the joint, you can further flex the joint to cut the tendons that will loosen up the joint. (see above how I have bend it more)

I also cut on either side of the joint through the skin to make the next step easier.

I set my knife down and hang on to either side and give it a good twist to break it apart. You could also use garden pruning sheers at this point and you'll be able to cut off the foot.

With my knife under neath the joint, I make my last cut to free the foot. Next I remove the wings.

I remove the wing at the second joint from the end of the wing. (my thumb is holding the first joint and the knife is pointing to the second joint)

From the top of the wing, I cut through the skin and feathers to the joint.

I use my hands to twist and separate the joint, and like I removed the foot, I place the knife underneath the broken joint for a final cut. Next I'm going to remove the chicken's skin.

Follow the breast bone with your fingers to find the end. This will be at the top of the chicken soft stomach. With one hand pulling up the skin, I make a shallow cut big enough that I can put my fingers in to pull it apart.

Using my hands I will make the hole big enough that I can get a good grip to rip the skin.

Pulling apart, I pull the skin and my hands towards the top and bottom of the chicken swiftly and firmly. If your chicken is young, this will be a breeze.

Because of the way I pull the skin, I've created this flap of skin I need to slice in half to continue skinning the chicken.

Slicing it creates two new flaps I pull apart to really expose the breasts.

Now I place my knife under the skin towards the neck and head. If you haven't already removed the head, this is the time to do so.

Once this is cut I can remove the rest of the skin from the neck.

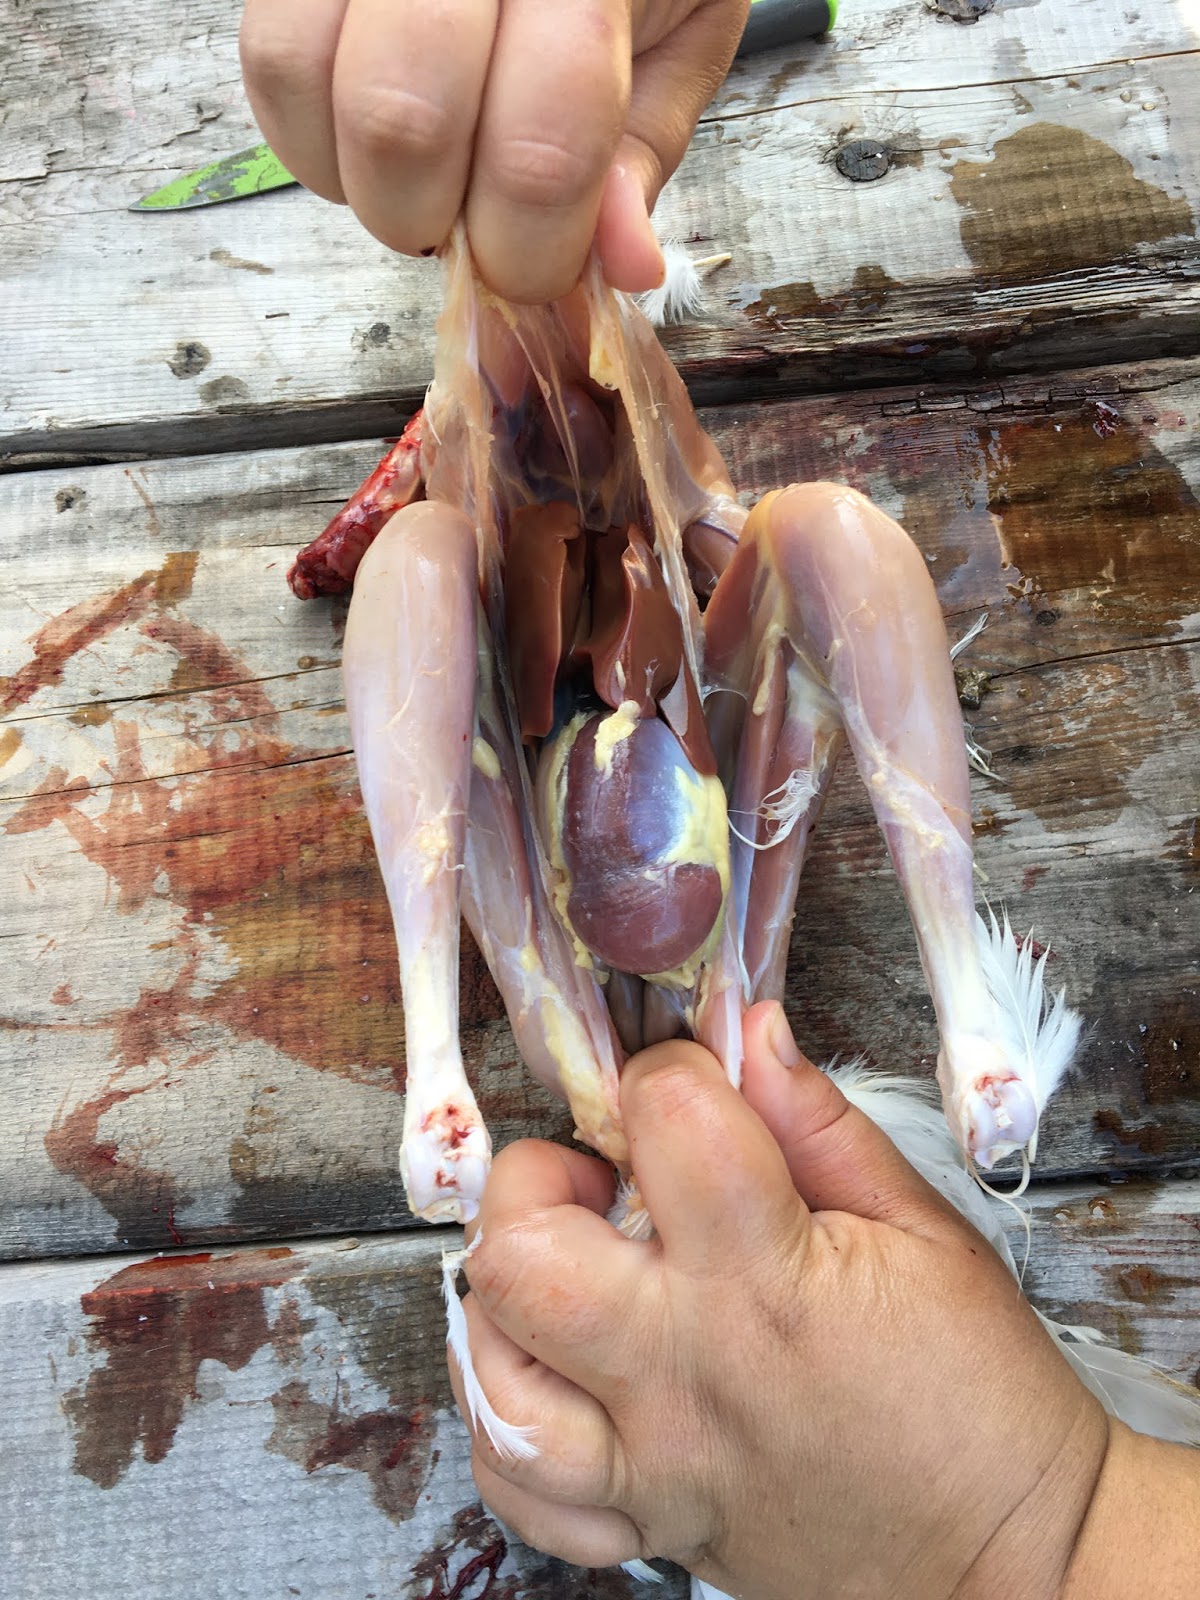
Now that the breast and neck are skinned, we start on the legs and what is left of the wings.

Gently pulling the skin away from the leg, I can break through the fascia with my fingers for a better grip and pull the skin off the leg.

If there is still feathers or skin in the end after you've pulled it off, you can just trim it with your knife.

Now that the legs, wings, neck and breast are all skinned I firmly hold the neck of the chicken and pull the skin down and off the back.

Firmly pull the skin right off the chicken's back in a swift movement. If it doesn't want to detach on it's own, cut it off but leave the tail feathers behind for the next step.

Now all you should be left with are the tail feathers which I use as a trail map for the final step of skinning a chicken.

Before I can open up the chicken to remove the insides, I have to go to the neck and separate the esophagus from the neck so it can be pulled through from the inside.

At the end of the breast bone I pull the meat away from the chicken make a shallow cut being careful not to cut into an intestine.

This hole is just big enough to get my fingers in and really pull the chicken apart. These roosters are really quite small at 12 weeks as they aren't a meat breed but it's still easy to pull the ribs up to expose the inside.
Don't be afraid to really pull it apart.

Next I go in with my hand to pull out all the organs. I do this at the edge of the counter so It can hang above the slop bucket. It's all still attached at the bum and tail feathers for a bit.

After most of the organs are pulled out of the way, I reach up for the crop, or stomach, and the esophagus I loosed earlier.

At this point, the organs and tail feathers are all in this last little bundle. I do it this way so I don't accidentally get poop on the meat or cut the intestines which can spoil the meat.

I use this leftover bit with organs and tail feathers as a road map for the final cuts. There is a back bone that I cut right up against.

I cut down one side of the bone, then the other side of the tail.

And lastly, one cut to detach the tail from the backbone. I go back in to pull the little kidneys you can still see inside, and the lungs which are bright pink and are nestled in the back of the ribcage.

You have butchered a chicken! I give it a really good rinse, remove any last feathers and voila! From this point you would normally place it in a cooler with water, ice and a splash of vinegar while you continue to butcher and then later bag and freeze.
But because we are off grid and don't have a freezer, they go directly into a boiling pot of water to cook. We de-bone them and pressure can the meat and the bones further simmer into a nutrient rich broth which we later pressure can. The the left over bones go into the garden as bone meal!
Here are some of our favourite chicken meals that aren't roasted chicken:


0 Comments